Because surely I’m not the only one doing a last minute costume?
Hi, everyone!
Maybe I’m getting this ready in time for you to make your own, or maybe you can save this for next year, but either way I hope you find this useful!
Last year for Halloween I was a super scary skeleton. I didn’t mean to be so scary, I guess I’m just really good at painting my face super scary.

Boo!
This year I wanted to be a skeleton again, because…it’s just so simple!
BUT, I don’t really want to go buy makeup and hurry painting my face again and only have it for a few hours. And I was cold and I had to wear a hoodie!
I happened to catch this video on HGTV Handmade on how to make a super cute Shark hoodie, and I thought hey, this could work either way. I could paint my face and be a shark attack victim, or not and still be a shark attack victim! So I took a little trip on over to the Walmarts and I got a few supplies to make my super cute quickie Halloween costume. In all this project took me about an hour and a half (counting all my photo taking time) and it only cost around $15 so this is a very inexpensive, super cute, last minute costume fix.
What you need:

- a gray hoodie in your size, no drawstring works best
- white felt sheets (I got three but only used two)
- a black felt sheet
- at least one red fat quarter (I’m using a size small hoodie, so for a larger size you will need more red fabric)
- coordinating threads (white, black, red and gray)
- marking tool (pencil, pen, whatever you prefer)
- some washi tape
- scissors
- straight pins
- some kind of sewing method (needles, sewing machine, whatevs)
- Sew-jams playlist (optional)
In the HGTV tutorial, they just hot glued everything, but I think if you can sew it, why not? It’s going to look neater! Plus I don’t like it when people glue fabric together…just sew it. JUST DO IT! I mean if you want to just glue it…you do it…but I don’t roll like that.
Step 1: Make Eyes
I’m starting here since I’m sewing them down, the stitching will be hidden on the inside. Start by making two large white circles around the size of a tuna can. These will be the whites of our shark eyes. I know sharks typically have those dead, soulless eyes, but these are going to be cute sharks…because I make cute things. Then you’ll cut out two smaller sized black circles. If your tuna can size white circles are about three inches across, make your black circles about two and a half inches across. If you want your eyes to have cute little shiny marks on them, cut out two small sets of white shinies.

You’re going to want to sew your smallest pieces on first, then work larger. The first step is the “eye shinies” if you’re adding them. You can either hand sew this using a simple basting stitch or use a machine and a zigzag stitch with coordinating white thread, I’m sewing mine with my machine because I don’t have time for that mess. Just arrange them in a way that would make the eyes look shiny, and make each eye mirror the other. Repeat this step for both of your shark eyes.

I wasn’t overly concerned with neatness on my stitches.
Next, you’ll want to sew the blacks of the eyes to the whites of the eyes. Switch to your coordinating thread, and again, use the stitching method of your choice. You can also pin this so it doesn’t wiggle while you sew. I’m using a zigzag stitch and black thread. I am not centering up the blacks of my eyes in the whites because my shark has that look in his eye that you get when you eat something amazing. Repeat this step for both eyes.


After your eyes are all assembled, you can attach them to your hood. Before you sew them down, play around with the placement until you find the right eye spot. I used some washi tape to mark my eye spots to make sure I had just the right spacing. I then switched back to my white thread and I sewed them onto the top of my hoodie. I made sure to position them so that the eyes aren’t looking all kooky and wonky. Just because I have a lazy eye doesn’t mean my shark has to!
Step 2: Make Teeth
Everyone knows sharks have rows and rows and rows of teeth. I don’t really feel like making my shark with a bunch of teeth, so I’m just making one row. I made a simple triangular teeth shape mountain strips, sort of like a jack-o-lantern…or shark teeth. I made more than one strip, but only because one sheet of felt wasn’t long enough to go from one end of the hoodie to the other. Check the length so that you make sure you cut enough teeth! I didn’t sew them together before sewing then in, I just pinned them sort of over lapping where they met.


Once I had my teeth ready, I pinned then sewed them down using a straight stitch and gray top and bobbin threads (I sewed with the teeth side up). I attached them just on the inside of the rim of the hood using a quarter inch seam. You won’t see these threads on the teeth in the end, so don’t worry about them being super neat. I used gray thread because you may see the thread on the outside and I just tried to make it blend as much as possible.
Now you could end right here and be perfectly fine, but I want to make the inside of my sharky mouth red, so…
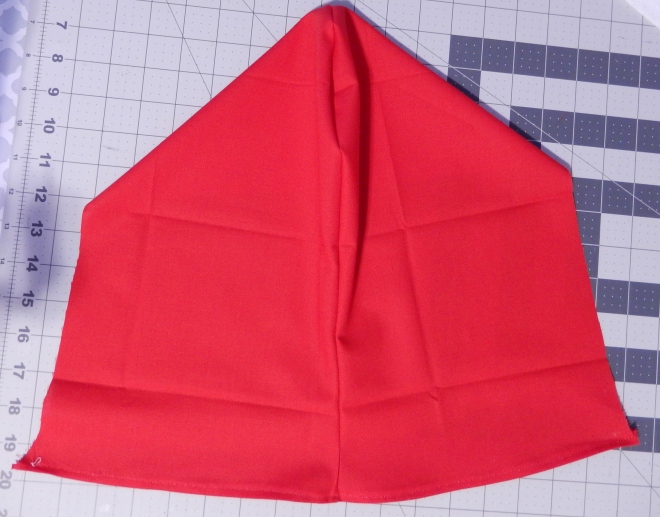
Step 3: Red inside Hood
So this step is a little weird. You can approach this in a number of ways, but here’s how I did it. I cut out two large, sort of bell shapes that I traced loosely based on the inside of the hoodie. I flipped my hood inside out and traced around on my folded over fat quarter so that the pieces would mirror each other. I made them a little larger so I would have some seam space. I made sure that they were going to fit inside of the hood, and cut them a little more accurately.
I sewed the two shapes together along the line that would run up the middle, making them into one lining. Then I went ahead and made a sort of a little hem along the bottom edge. Just in case I decided not to fully attach that part to the hoodie, I wanted to leave a finished edge. This next part may be a little tricky.
Take the rounded outer edge that will go along the edge of the hoodie and pin them down with the teeth sandwiched between the outside of the hoodie and right side red fabric. Make sure you have your teeth pointed in towards the right sides of the fabric. Make sure that your seam on your fabric in the middle is lined up with the middle seam in your hoodie, and also facing up. Sewing this in will hide the “flat edge” of the teeth inside the red fabric, and it’ll give you a nice, clean, finished seam. Sew this down using red thread, then flip the hood right side out so the red will now be on the inside of the hood, your teeth will be layered between the red and gray, like how teeth really are in a shark!
After this you can top stitch it down, again using coordinating threads (red on the top, gray on the bottom) so your shark will have some fancy lips. You could also attach the inside of the red into the hoodie, once again using the red thread on the red side and gray on the outside.


Tadah! Now you’re done! Wear your cute shark hoodie out any way you want! I’m just pairing mine with jeans because I’m just handing out candy. I may not just limit this cutie to Halloween only wear, he’s so adorable!


Let me know if you use this to be a cool shark like me this year, or next year, or anytime! If you do and put it on social media, PLEASE tag me I’d love to see it! You can use either #cutefluffinstitch or @cutefluffinstitch on Instagram or Facebook.
You could totally make this your own in a number of ways; add some gill lines or add eyelashes around your eyes with some embroidery floss so you’d be a sweet girly shark, make a whole series of family sized hoods making a shark frenzy (apparently that’s what groups of sharks are called.) You could even use a blue hoodie and be that incredible beast known as Left Shark from Katie Perry’s Superbowl halftime show.
I hope you all have a fun and safe Halloween weekend, and try to avoid clowns. Until next time, happy sewing!
P.S. Here’s a collection of silly shark things to make you not be afraid of them.


I have to go to a party tomorrow night and I still haven’t even come up with a costume idea! This one may be just the thing! Thanks for the thorough tutorial!
Add a back find on the back of the sweat shirt!!
Cute!!
Thank you! I thought about adding a fin, but I didn’t want to squish it so I left it off.